
5 super easy recipes to make healthy and delicious lacto-fermented veggies.
By the end of this article you will have all the knowledge you need to easily and cheaply make your own super healthy and scrumptions lacto-fermented veggies.
Let's be clear from the start
lacto-fermenting vegies is easy-peasy. You don’t have go geek out and buy expensive equipment or track down exotic cultures. You don’t have to be privy to a huge body of esoteric knowledge It is as simple as:
1
Chop up your veggies
2
Add some salt
3
Stuff them all in a jar
4
Leave them to ferment
So how does it work?
There are gazillions of micro-organisms in the air all the time. That is why stuff goes off if you leave it lying around. The fungi and bacteria, that do this work (nature’s garbage disposal workers) will turn vegies into a slimy smelly goo if they get a chance. By adding just the right amount of salt or brine to your vegies, you exclude just about all of the slimy smelly goo microbes and favour the good guys who will do the fermenting.
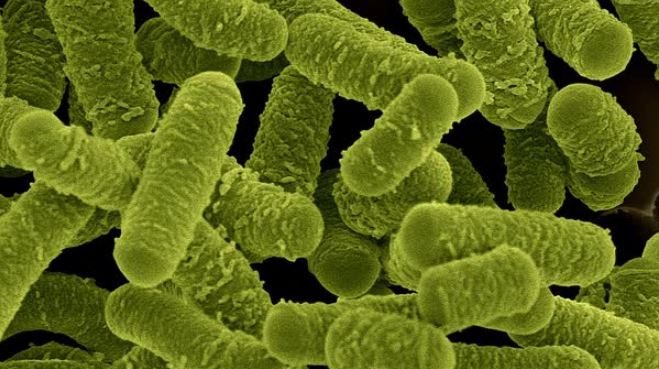
A bit of biology for science for geeks like me
The suite of micro-organisms who work in salty conditions are the lacto-fermenters. The “lacto” bit comes from the fact that they derive their energy form turning sugar and starch into lactic acid. The lactic acid is what makes fermented foods, like yoghurt, sour dour and sauerkraut, sour. It is also what prolongs their shelf life. The lactic acid drops the pH of the food below the level of what most harmful microbes can tolerate (pH 4.9 and lower) so your food does not go off.

The different organisms
There are many many different types of lacto-bacteria used to ferment foods. Here are some of them and the types of foods they help make;:
- Yogurt: Lactobacillus bulgaricus, Lactobacillus acidophilus, and Streptococcus thermophilus
- Kefir: Lactobacillus Caucasus, Leuconostoc, Acetobacter species, and Streptococcus Some beneficial yeast is also involved.
- Sauerkraut Strains of the genus Leuconostoc are involved as well as Pediococcus and Lactobacillus strains like Cucumeris.
- Kimchi: Lactobacillus kimchii.
The different type of organisms combined with the food they are working on are responsible for the the unique range and blend of flavours possible with fermented foods – yum!
And, there are compelling health benefits associated with eating fermented foods
It turns out that there are a heaps of health benefits associated with fermented foods. Check out this article. One of the reasons for this is that when you eat a mouthful of a fermented product you are ingesting trillions, and I do mean trillions, of beneficial microorganisms that contribute to the healthy balance of your gut ecology or biome.
“It’s worth noting that each mouthful of fermented food can provide trillions of beneficial bacteria—far more than you can get from a probiotics supplement, which will typically provide you with colony-forming units in the billions. I thought this would be a good analysis, so I tested fermented vegetables produced with our probiotic starter culture to determine their probiotic potency and was astounded to discover they had 10 trillion colony-forming units of bacteria. Literally, one serving of vegetables was equal to an entire bottle of a high potency probiotic!” Dr. Mercola

Increasingly, medical science is demonstrating just how important the composition of our gut flora is. It has been linked to everything from metal health to the state of our immune system..
OK! Enough of the sciency stuff - on with the how-to bit
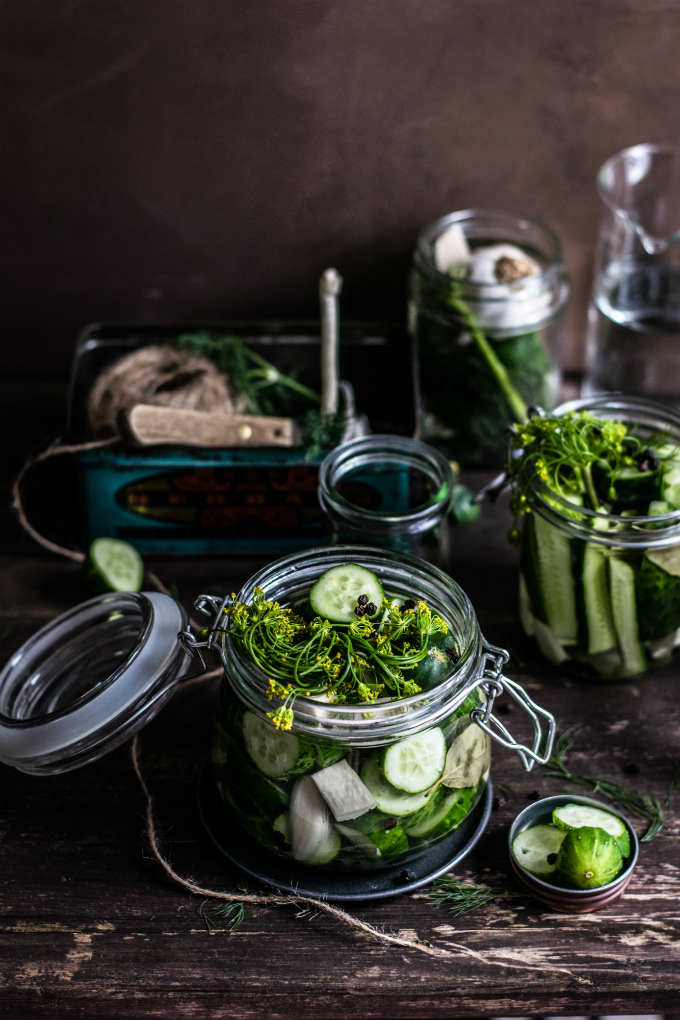
How to easily make tasty lacto-fermented pickles
1. Make sure everything is clean.
Since lacto-fermentation relies on the suite of bacteria detailed above, it is important to give them a head-start by removing as many unwanted bacteria as possible. But don’t go as far as using bleach or anything drastic like that. Just make sure your hands, equipment and jars are clean and washed with hot soapy water!
2.Exclude air from the fermentation environment.
The lacto-fermenting bacteria need an anaerobic environment to ferment correctly. That is, they don’t work where there is oxygen. So, tightly pack your vegetables into the fermentation jar so their juices cover them. If there are not enough juices after packing them down, then pour brine over them and weight them down so they remain under the liquid.
3. Get the right saltiness.
This works out to around 1-3% salt per kilo of vegetables or per 1 L of water (brine). Less and you run the risk of nasty microbes getting a foothold, more and you will kill the fermenters. As a rule of thumb your will need about 20gms of salt per kg of vegies or per 1 litre of water.
4. Maintain a moderate temperature
Keep the temperature between 15C (60F) – 21C (70F) degrees. If it gets cooler than 15C the fermentation is slow, higher than 21 and the fermentation is too fast and you will end up with a mushy unpleasant result.
5. Stop the fermentation.
Once you’ve achieved the desired level of sourness and taste you can stop the fermentation by moving the vessel into the fridge. The longer it ferments the sourer it gets. You can test this by regular tastings
There you have it. That is about all the knowledge you need to get fermenting.
Now
Here are a some must-try lacto-fermented recipes.
Basic sauerkraut

Fermenting changes the humble cabbage into a scrumptious gourmet food that is delicious on its own or added to salads, soups, on top of meats or to make a hot-dog outstanding. Millions of Germans, eastern Europeans and Russians can’t be wrong.
Ingredients
2 large cabbages (about 2 kgs)
¼ cup of sea salt (see note)
2 Tbsp of caraway seeds or cumin seeds (or none at all)
You will also need
· Large open mouth glass jars, like a mason jar, with a lid.
· Something heavy and inert, like a stone, that will fit inside the jar to weigh down the cabbage, so it remains under the brine.
1. Clean your equipment, work surfaces, and your hands in warm soapy water.
2. Slice the cabbage into thin ribbons- remove the outer leaves and cores from cabbage and cut into quarters. Slicing is easily done with a mandolin if you have one, but a sharp knife will do the trick too. Put in a clean large bowl or bucket.
3. Sprinkle the salt over the shredded cabbage. Add the spice seeds at this point if you are using them. Knead and squish the cabbage with your hands until it releases its juices (5minutes or so). By the end, there should be enough liquid to cover the cabbage in the fermentation vessel. If there is not enough liquid add a little brine to cover. Make the brine by adding 10gms of salt to 500ml of non-chlorinated water (do not use tap water)
4. Tightly pack the cabbage into the jars or a fermentation crock. Really press it down with your hands or an implement. Pour any liquid from the bowl into the jar. If needed, add just enough brine to cover the cabbage entirely.
5. Add some weights to the top of the cabbage to keep it under the surface of the brine. I use smooth river stones (that have been washed with boiling water). Close the lid
6. Fermentation will start immediately and can take up to 3 weeks depending on temperature and how sour you like it to be. The best flavour seems to be at about the 2-3 week mark. Start tasting the batch after about a week to keep track of flavour development. By this stage it should be slightly sour.
7. When the cabbage is at the right level of sourness for you put it in the fridge to stop the fermentation. At this point it can be eaten right away, or it will store in the refrigerator for up to six months.
Notes
- The salt should be at a ratio of about 2% by weight. Thus, you would add 20gms of sea salt to a batch of sliced cabbage that weighs 1 kg. To make a brine to add to the cabbage you would add 20gms of sea salt to 1 litre of non-chlorinated water,
- Never use tap-water to make brine for fermentation – it will kill the fermenting organisms
- It is normal to see bubbles, white scum, or foam at the top of the fermentation. If any mould develops scrape it off and make sure all the rest of the cabbage is fully submerged. The mould does not grow in the salty water.
Spicy lacto-fermented salsa
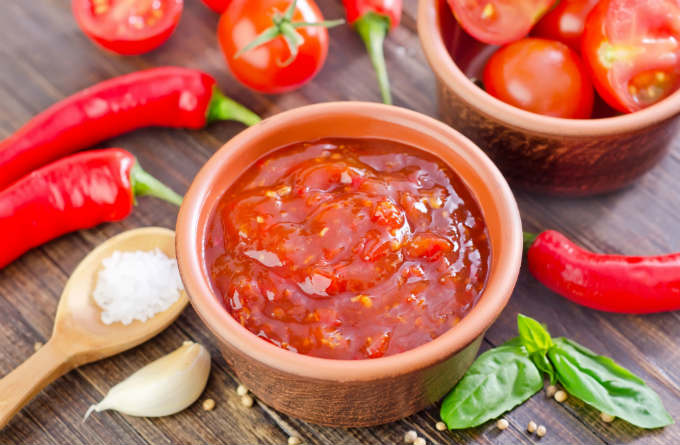
This traditional salsa has a nice tart and pungent taste that is great with meats or eaten straight up with nachos. It stays good for a long time in the fridge,
Ingredients
12 cups of fresh tomatoes, finely chopped;
2 cups of reasonably hot chilies, seeded and finely chopped*
1/4 cup dried oregano;
2 tbsp cumin
8 garlic cloves, chopped
2 onions, finely chopped
1/4 cup sea salt;
You will also need
- Large open mouth glass jars, like a mason jar, with a lid.
- Something heavy and inert, like a stone, that will fit inside the jar to weigh down the cabbage so it remains under the brine.
Note: choose the type of chilli according to what heat level you like – I mix the types to get just the right combination of heat and taste
Instructions
- Wash all the jars, implements, working surfaces and hands with hot soapy water.
- Combine the chopped tomatoes, chilies, oregano, cumin, garlic and onions together.
- Place the tomato mixture little by little in your fermentation jar adding salt as you go. Mash it down into the jar by lightly pounding so the tomatoes release their juices.
- Make sure the mixture fills the jar up to no more than 1 inch below the top and that the extracted water covers the vegetables entirely.
- Place a weight, like a clean rock, on top of the mixture to keep the vegies under the brine.
- Place the fermentation jar in a warm spot and allow the salsa to ferment for 3 to 5 days.
- Check on it from time to time to be sure that the brine covers the mixture and to remove any mould that may form on the surface.
- Taste it during the fermentation process and move it to the refrigerator when you’re satisfied – it should be nice and tangy indicating the increased acidity.
Kimchi

Kimchi is a ubiquitous competent of most Korean tables – super healthy, super tasty and awesome. Use it straight up as a side dish, in salads and soups.
Instructions
- 2 heads Napa cabbage;
- 2 Daikon radishes, peeled and sliced;
- 5 carrots, peeled and sliced;
- 1 pureed apple (not essential but adds the x factor )
- 1 pureed pear (not essential but adds the x factor)
- 1 bunch scallions, sliced;
- A 2-inch piece of fresh ginger, minced;
- 10 garlic cloves, chopped;
- 1/4 cup fish sauce;
- 1/2 cup Korean chili paste to taste (you can substitute with hot chilli sauce or some pounded fresh chillies)
- 1 1/4 cups sea salt;
You will also need
- Large open mouth glass jars, like a mason jar, with a lid.
- Something heavy and inert, like a stone, that will fit inside the jar to weigh down the cabbage so it remains under the brine.
Instructions
- Wash the cabbage leaves and let them soak overnight in a brine of 1 cup sea salt and 5 litres of water.
- Once soaked, discard the soaking liquid and cross cut the cabbage into chunky pieces.
- Combine the cabbage with the rest of the ingredients.
- Add 1/4 cup sea salt to the mixture and combine well.
- Place the mixture, little by little, into your fermentation jar, pounding it vigorously to release the juices.
- Make sure that the extracted water covers the mix entirely. If not, create a brine of 2 tablespoons sea salt to 4 cups of non-chlorinated water and add it to the mixture.
- Press and weigh the mixture down so it stays under the brine. I use a river rock to do this.
- Cover with a clean towel or loosely tightened lid.
- Place the fermentation jar in a warm spot and allow the kimchi to ferment.
- Check on it from time to time to be sure that the brine covers the mixture and to remove any mould that may form on the surface.
- After at least 3 days, taste it to see if it is done. It’s ready when you like the taste. The longer you let it ferment the sourer it will become.
- When it is done put it in the fridge.
Lacto-fermented Louisiana style hot chilli sauce
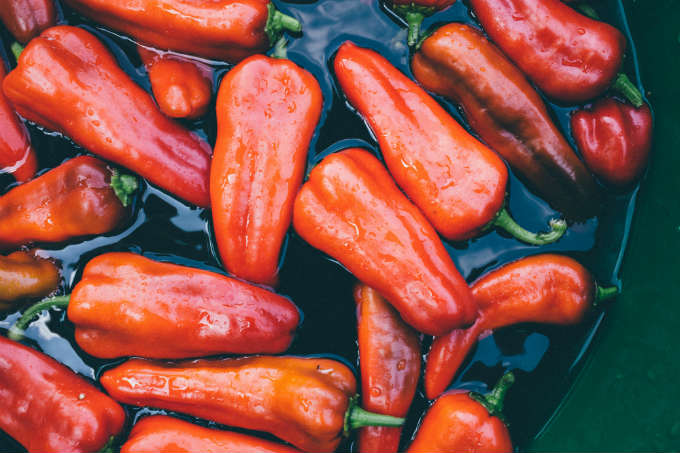
Do you like Tabasco sauce? Yum. Kind of expensive though, right? About $7.50 for 150 ml the last I checked. With this recipe you will end up with a couple of litres for a few bucks and it will taste heaps better than the shop bought one. This is delicious with just about anything including your morning cereal 😉
Ingredients
About 5 cups of mixed chillies – according to taste*
Tsp mix peppercorns
6 cardamom pods
6 crushed pods of garlic
6 Tbsp sea salt
6 Tbsp of sugar
2 L purified water
Instructions
- Cut the tops off the chillies, cut down one side and remove the seeds.
- Wash them in tap water.
- Place the peppercorns, garlic, salt, sugar and cardamom pods and about 500mls purified (non-chlorinated) water in a 2lt glass jar. Swirl it around to dissolve the salt and sugar.
- Pack the chillies into the jar and add the rest of the water so that the chillies are covered. Put the lid on the jar and loosely tighten. The looseness allows the gas to escape. Give it a bit of a swirl to mix things up.
- Leave in a warmish place for about 1 ½ weeks – then knead the chillies a bit to release the oils and encourage further fermentation.
- Leave for another 1 1/2 to 2 weeks.
- Drain and retain the brine.
- Place the chillies in a blender with about 250mls of the brine.
- Blend on high until you reach a smooth consistency.
- Add brine until you reach your preferred thickness for the sauce.
- If you prefer a really smooth consistency, pass the sauce through a fine sieve to take out any unblended bits.
- Put into clean bottles and keep in fridge. It will last for ages.
Notes
For a fiery hot brew use habanero peppers. To tone down the heat, mix the habaneros with jalapenos and cayenne or other types of pepper according to taste. Or you could leave out the habaneros altogether. Your call. Play with the mix. Be creative.
Tangy lacto fermented beetroot and carrot mix
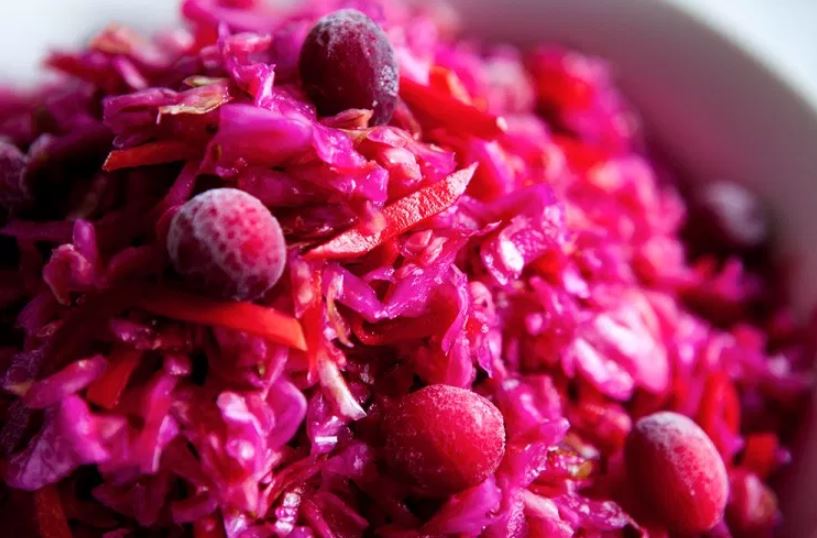
This super heathy combination of power vegies, when fermented, creates a tangy taste sensation that you can chow down on its own, as a side to a main or add to salads and soups.
Ingredients
3 large beetroots
6 medium size carrots
6 cloves of garlic
Tsp of cumin seeds
5 cardamom pods
You will also need
- Large open mouth glass jars, like a mason jar, with a lid.
- Something heavy and inert, like a stone, that will fit inside the jar to weigh down the cabbage so it remains under the brine.
Instructions
- Clean your equipment, jars, work surfaces, and your hands in hot soapy water.
- Grate the carrots and beets and place them in a large bowl or bucket.
- Add the remaining ingredients. Knead and squish the mixture with your hands until it releases its juices (5minutes or so). By the end, there should be enough liquid to cover mix when you place it in the fermentation vessel.
- Tightly pack the mixture into the jars or fermentation crock. Really press it down with your hands or an implement. Pour any liquid from the bowl into the jar. If there is not enough liquid to cover the vegies add a little brine. Make the brine by adding 10gms of salt to 500ml of non-chlorinated water (do not use tap water).
- Add some weights to the top of the mix to keep it under the surface of the brine. I use smooth river stones (that have been washed with boiling water). Close the lid.
- Let it ferment for about 3 days and test the taste. Because of the sugar content of beets and carrots fermentation proceeds quite rapidly. If after 3 days you like the taste, then place in the fridge.
Notes
- The salt should be at a ratio of about 2% by weight. Thus, for a batch of grated vegies that weigh 1 kg you would add about 20gms of sea salt.
- If you need extra liquid to cover the vegies during fermentation, then make a brine of 10 gm of salt to 500 ml of purified water.
- Never use tap-water to make up brine for a fermentation – it will kill the fermenting organisms
Other posts you may be interested reading
